
I think by now everyone knows we are in a major cost of living crisis. The cost of basics and necessities is starting to become out of pocket for many people who live from paycheck to paycheck and making the best use of bargains and special offers on basic ingredients is so very important. Part of doing that is knowing the best ways for you and your family or household to be able to store and preserve your haul/glut/extras.
As I write this I am aware that Aldi here in the UK is putting a price cap on their “Christmas Veg”, this means that they are only charging last years prices for them this year. This offer will be available from the 18th of December 2023. If you don’t live here but are aware of stores in your area doing similar things or you grow your own vegetables then this blog post I hope will give you some ideas or even reminders that there are different options out there for you.
Accordingly to last years prices this year we are able to purchase carrots at Aldi here in the UK for 19p per 1Kg bag. That means for 95p (which is about the cost of 1 and 1/2 1Kg bags) we can purchase 5Kgs. That’s alot. It gives us a wide scope for storing them and the ability to make alot of things ahead of time that are going to help us make life a little easier moving forward.
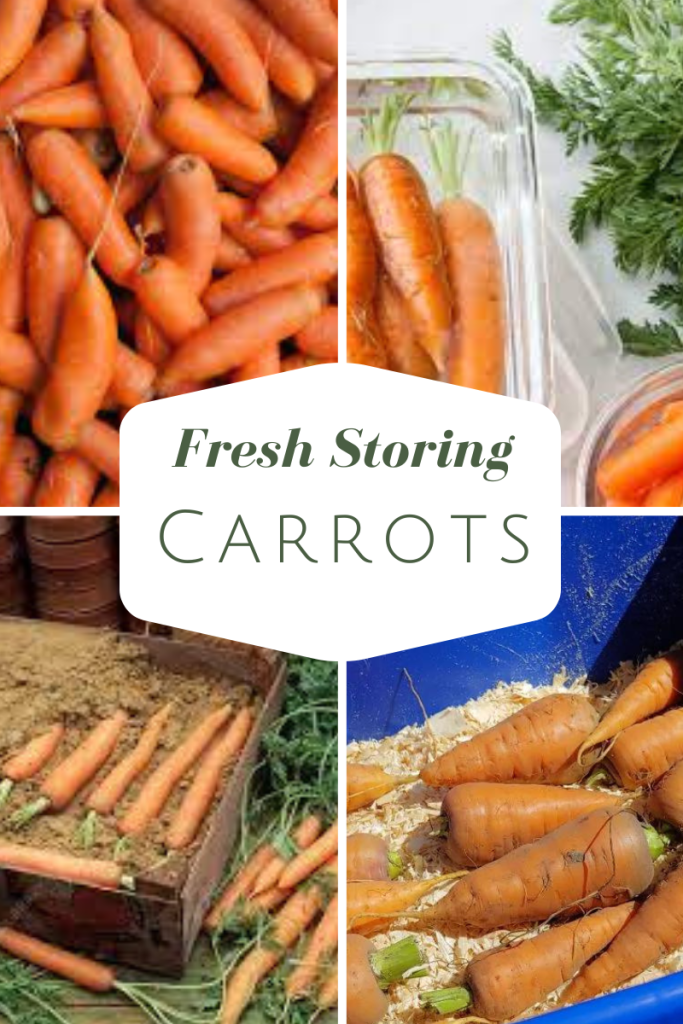
1 STORING FRESH CARROTS
Science Photo Library – https://www.sciencephoto.com/media/26402/view/storing-carrots
Homestead How To – https://homesteadhow-to.com/storingcarrots/
Kew Gardens – https://www.kew.org/plants/carrot
Storing our carrots for use fresh is one of the easiest and cheapest forms of preserving. It means we can use them as and when we think about it and not have to think about storing premade items. On the flip side of that it means we have to think about and make time for what we are making at any one time. If we don’t have the money to put on the electric or gas meter then it can make life a little more difficult however it does give us a wider scope of what we make and when.
Typically to store your carrots you want to have a dark and cooler space like a shed or cellar or if you are really lucky a root cellar. Storing your carrots in wooden or plastic crates layered in damp sand or sawdust will will make sure that the carrots stay “alive” to a degree and won’t go into the rotting process and it will help to keep them from “sweating” but the sand and sawdust will keep the condensation from the skins of the carrots so they won’t rot but will keep them generally damp enough to stay fresh.
When storing them this way you want to keep them in as natural a form as possible which means trimming the greenery but not all of it and lay them in on a 2 inch (5cm) layer of sand in one layer then add another 2 inch (5cm) layer of sand and keep going until the crate is full and the carrots happily covered.
If you are lucky enough to have a root cellar you won’t necessarily need to keep them in sand or sawdust as long as you have a nice dark space that is incredibly cool and has decent airflow around the produce.
One of the most important things to remember about storing fresh carrots is to take them out of their plastic bags. These help cause rot and very very quickly. Carrots are actually still a living breathing part of the plant when you buy them so forcing them into an air tight space where they will be producing damp air as they breathe will cause major condensation in the bag which then as the carrots sit in it will cause them to rot as it is not fresh water.
Having said that keeping cut or bought carrots in the fridge in jars or conatiners of water once you’ve washed them will actually help to keep the cut carrots fresher longer and store bought ones will happily stay in the container fresher than just in the veg drawer if you regularly change the water. I personally prefer not to do this with whole carrots as it is time consuming and a regular job i need to stay on top of and as I am someone who get’s easily distracted can forget and the whole thing ends up a nasty mess I then have to deal with.
If you want to read more on this subject please check out the video and links under the graphic at the beginning of this section.
2 FREEZING CARROTS

Simplify Live Love – https://simplifylivelove.com/preserve-bumper-crop-carrots/
Sustainable Cooks – https://www.sustainablecooks.com/freezing-carrots/
The Rustic Elk – https://www.therusticelk.com/freeze-carrots/
Freezing carrots takes a little more effort and in most cases we want to freeze them in the shape we want to use them. Blanching our carrots or rather the carrot shapes is going to be important as this helps with the freezing process and means the carrots will not crack go mushy once defrosted or the cooking process completed.
First off if you are going to freeze your carrots you are probably going to want to peel them as this ends up with a better product but the choice is yours.
Blanching your carrots means that once you have the shape you want, whether you want to make small dice, medium dice, large dice, sticks, julienne, roasting pieces, rings, diagonal slices or ribbons you pop them into a pot of hot water on the stove and bring them to the boil.
You then remove the carrots and drop them into a bowl of iced water to stop the cooking process.
At this point the carrots need to be drained and dried. I prefer a clean tea towel as when I do this I do alot.
Place your carrots on a baking tray in one layer and lay flat in the freezer until frozen.
At that point you can then place your carrots into whatever freezer bags or containers you choose to use and you are done.
Of course this is just about plain carrots for use in whatever way you want when you decide how to use them. This does not include premade dishes which we will get into a little down the line.
If you want more on this subject please check out the video or the links underneath the graphic at the start of this section.
3 WATERBATHING CARROTS

I live in the UK. Here waterbathing is a more popular way of “canning” foods. Along with many countries across the world in Europe, Eastern Europe, The Middle East, Asia, Africa and Australasia. It is my preferred way honestly and I have my own reasons for that. It is cheap, easy and can be done over a BBQ or wood fire and in a stock pot if that’s all you have.
There are two schools of thought when it comes to waterbathing carrots. One is that you need to peel your carrots and the other than as long as they are well washed and have no risidual dirt on them then you don’t have to peel. I do prefer if waterbathing to peel mine. The choice at the end of the day is yours. I prefer to peel them as we do not like the peels after water bathing. Also we tend to have alot of blemishes that need to be removed so by the time you’ve cut those off there’s not really alot of peel left anyways so we just peel them and save ourselves a step or two.
The following link is to a great video on waterbath canning carrots. Please be aware this video is made in the US and they use predominantly a 2 piece lid system where many of us use the 1 piece “lug” lid. It’s the same process just you don’t have a ring to take off once they’re cool.
Also Pint jars are around 500ml and Quarts are 1 litre.
I have chosen this video to share here as I haven’t gotten around to making my own as yet which is fine and video shows all you need to know in a friendly and informative way.
4 DEHYDRATING CARROTS

Getty Stewart – https://www.gettystewart.com/how-to-dehydrate-carrots-and-how-to-use-them/ Fresh Off The Grid – https://www.freshoffthegrid.com/dehydrating-carrots/
Clean Eating Kitchen – https://www.cleaneatingkitchen.com/how-to-dehydrate-carrots/
Dehydrating is a process that not only take time but can take some equipment. Although some dehydrating can be done using the air dry method and some can be done using the oven. Air drying can take days sometimes weeks and oven drying can take up to 48 hours and I don’t know about you but I do not have the gas or electric to run that. If you are handy though and live somewhere where this could work well there is always using a solar oven and it does work incredibly well.
If you are going to be doing alot of dehydrating to perhaps invest in a good dehydrator. I would suggest if you are going to invest in one for use if you grow your own veg and fruit or make use of awesome offers like the one mentioned above then you need to get yourself a good catering quality one with a fan at the back. Not only do you not have to be there to change the shelves or racks around but it can be left going fairly safely while you go off and do other things. It also has a timer and a temperature control so you can be more accurate with your dehydrating.
No matter how you are dehydrating your carrots there are a couple of things you need to think about and keep in mind when doing it.
- You need the freshest, most firm and least blemished carrots.
- You need a pot on the stove that can fit a steamer basket in it or that you can removed the potatoes quickly and safely from blanching.
- Peel your carrots, peels don’t dry so well and can rehydrate into a weird texture.
- Keep your pieces no matter your shape consistant. This will help to maintain the drying time across the whole product.
- You do NOT need to blanch carrots before dehydrating although it can be done if you prefer.
- Dry on 50C or 125f for between 8-12 hours this will depend on the cut and size of your pieces and the strength of your dehydrator.
- If you are using a stackable style dehydrator you will need to move the shelving after each hour to put the bottom rack to the top and the top to the bottom.
- Dry as much as you can. They drier the better.
- You need to keep them in an air tight container, jar or mylar bag afterwards and for extra security place oxygen absorbers in each container you use.
- For the next few weeks shake your jars or containers to make sure none are sticking to each other and there is no sign of moisture.
If you want more on this subject please check out the video or the links underneath the graphic at the start of this section.
5 FERMENTING CARROTS

Taste of Artisan – https://tasteofartisan.com/fermented-carrots/ Susan Joyful Table – https://susanjoyfultable.com/recipes/basics-seasoning-mixes/fermented-carrots/ Homesteading Family – https://homesteadingfamily.com/homemade-fermented-ginger-carrots/
Fermented Foods are a staple for me and I love them. Possible because I am a pickle fiend. There is something about that sour almost salt and vinegar flavour to the veg when fermented that really does appeal to my flavour senses. Then of course are the health benefits. Fermented foods are full of lactobacillus bacteria which are AMAZING for gut health and for those of us with digestive issues this is a must in the cupboard and on the table.
Fermented foods can be quite over powering sometimes but that is why I love fermented carrots so much. The natural sweetness is absolutely the best balance with the sourness of the ferment. Carrots are a great way to start out on a journey with fermented foods if you are not used to making them or eating them and to introduce kids to them. They are easily recognisable, naturally balanced in flavour and quick and easy to prepare.
Like with anything though make a small amount if you aren’t sure. Try it several different ways before you make a final decision. Even try different lengths of time of fermentation apparently the longer you leave them the stronger the flavour and they can be fermented for between 3-30 days.
For me this is a very quick and simple way to get food preserved as well. It can require just a glass jar, a bowl and something to pound the veg (depending on the recipe). It is easily made with what you have around the house and although you can get all kinds of air locks and fermenting lids and jars and buckets etc maybe leave those until you know for certain how much you love them and how much you will reasonably use.
Using a normal jar with either a clip lid or a one piece “lug lid” is actually fine you just need to remember to 2-3 times a day “burp the lid” this basically means loosen the lid to let the built up gases out and then place back the lid.
With airlocks you don’t need to go through this process as the gases release through the airlock. I fill mine with white vinegar and not water as i feel it adds that extra layer of protection.
If you are lucky enough to get hold of a Kimchi, asian pickle jar or a saurkraut pot then you only have to keep the moat of water full and clean and it will release the gases regularly and keep all the nasties out too. This idea isn’t affiliated or anything but if that idea appeals to you I got all 5 of mine off Temu for the price of 1 so maybe worth having a look there. They do look very pretty on the shelf when done and remind you you have things you can use right now for dinner.
If you want more on this subject please check out the video or the links underneath the graphic at the start of this section.
6 PICKLED CARROTS

Peter’s Cooking Adventures – https://petersfoodadventures.com/quick-pickled-carrots/
Takes Two Eggs – https://takestwoeggs.com/vietnamese-pickled-carrots-and-daikon/
Epicurious – https://www.epicurious.com/recipes/food/views/quick-pickled-carrots-56389447
This is something I have done is several different ways over the years and each way has it’s own flavour profile and texture which brings a new element to meals and that can only be a very good thing.
I love pickles with meats and fish and even in soups and stews and as an interesting element to fried rice and noodle dishes. I think my bestest favourite though has to be on their own, straight from the jar. Did I mention before I am a pickle fiend. I don’t know why but if I see a jar of open pickles I have to keep diving into it.
There are different methods of pickling carrots as each of the ones mentioned above will show you. Some people (myself included) prefer the natural slow pickle. Basically you put your carrots in the pickle brine and leave it alone in a dark cupboard for a few weeks to do it’s thing. No maintenace, no fancy equipment just a glass or stoneware container with a lid and you’re good to go. needed really and when I open my cupboard there are new surprises waiting for me most weeks.
Some people make a very weak pickle brine and then pressure can or waterbath the jars. I honestly prefer not to. Again though You Do You Boo. Whatever way works for you and suits what you are used to and your palete is what you should go with.
I have ADHD and giving me things I have to look after and remember to check on all the time really is pointless and I like having surprises that are suddenly ready in the cupboard. It’s kind of like having free food turn up. Sure I know I made it but I forget they are there so when they are ready it’s a great surprise.
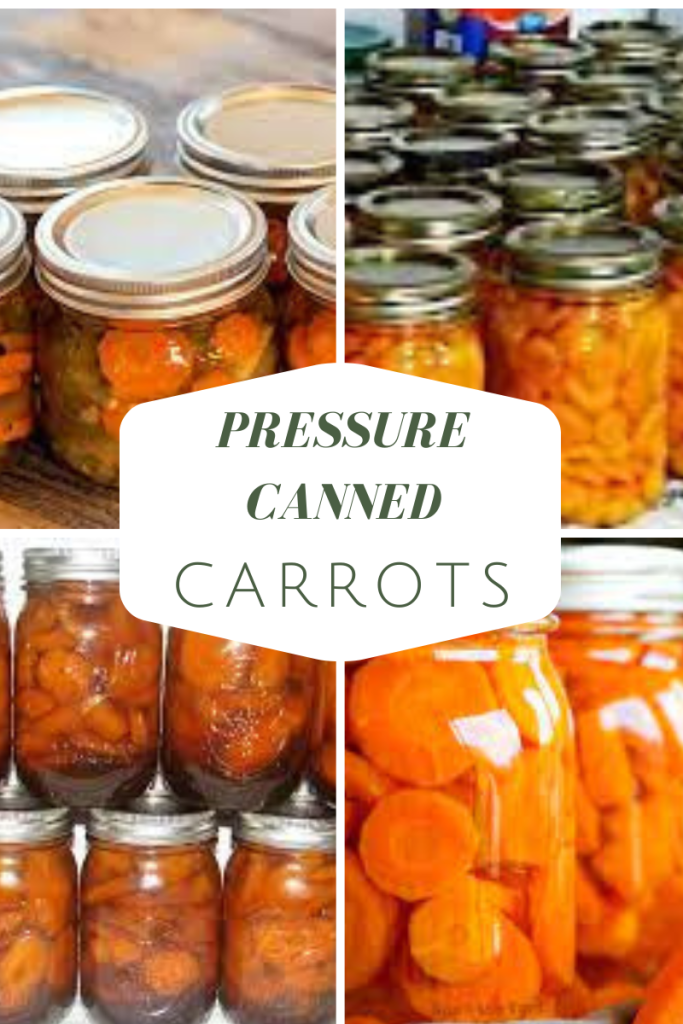
7. PRESSURE CANNING CARROTS
Texas Recipe Workbook – https://www.recipeworkbook.com/chiles-en-vinagre/
Food Preserving – https://www.foodpreserving.org/2014/06/pressure-canned-orange-glazed-carrots.html
Num’s The Word – https://numstheword.com/how-to-can-carrots/
I make no bones about the fact I do not pressure can. I don’t like them, don’t trust them and frankly just plain old can’t afford one. However many people across the US and Canada do use them and it is their prefered use of preserving and that’s ok. It is picking up a little traction over here but for the most part canners still need to be imported. I am always going to include it because it is a completely legitimate for of preserving.
I do not know anything on this subject but the 4 links under the graphic absolutely do and the following channels on YouTube are great resources for such things so please do go and check them out and as always before you try anything… DO YOUR OWN RESEARCH AND ASK QUESTIONS !!!
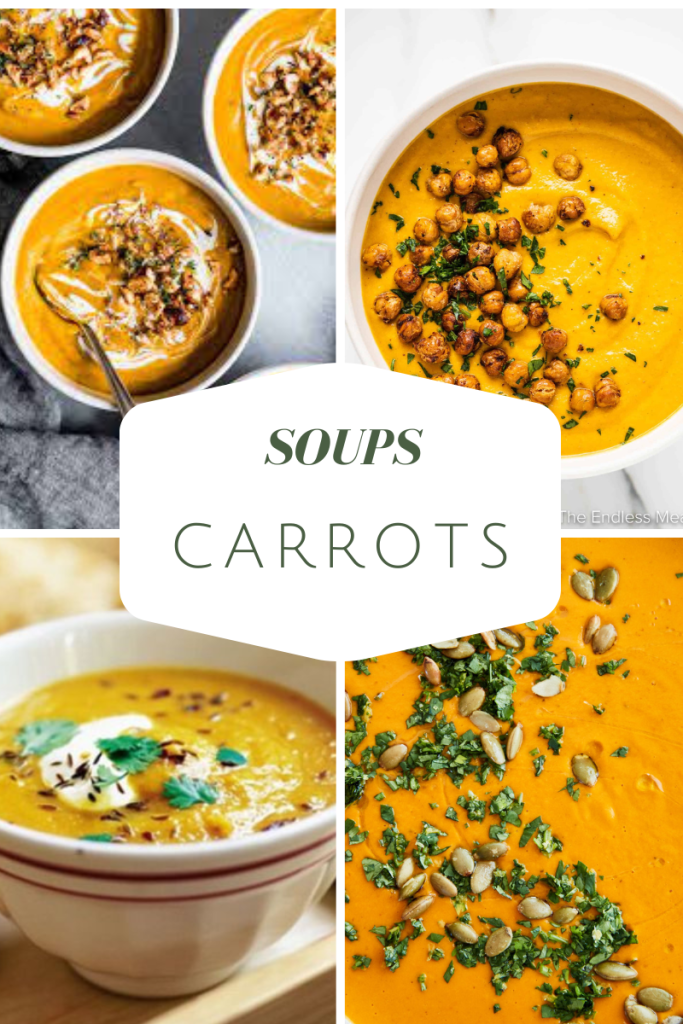
8. SOUPS
Naturally Ella – https://naturallyella.com/coconut-curry-carrot-soup/ BBC Good Food – https://www.bbcgoodfood.com/recipes/collection/carrot-soup-recipes
Snixy Kitchen – https://www.snixykitchen.com/moroccan-carrot-soup/
Do a Google search for Carrot Soup and you end up with over 44 MILLION posts. Not to mention alot of my cookbooks (of which I have 2000+) have recipes for it in there, each one slightly different from the last. Carrot soup I think is safe to say is pretty popular.
Apart from being one of the most vibrant soups that gives you that wonderful colour in the depths of winter which gives you a wonderful seratonine hit just by looking at it. Soup for me is an easy and good way to make carrots go further and to use things like the peels or not so good carrots last that little bit longer.
Carrot and Orange and Carrot and Coriander Soup were incredibly popular when I was working as a chef needless to say I choose not to go near those particular ones now because after you’ve cooking the same thing for 20 years the last thing you want is to make it again. My person prefereance are Carrot soups with Moroccan or Middle Eastern Flavours as they marry really well with the earthy sweetness of the carrots. Above under the graphic you will find some great resources and recipes for Carrot Soups.
If you want to make your Carrot Soup last a bit longer then you have a few options. You can make it shelf stable by water bathing or pressure canning or you can freeze it either in a family sized container or do as I do and place 1 serve of soup in a small baggie, lay flat to freeze and stack them like files in a drawer. Saving room and making life a little easier to pull them out as needed.
Please do your own research when preserving any foods though especially things likes premade meals like soup.
9. SIDE DISHES AND PREMADE MEALS

All Recipes – https://www.allrecipes.com/recipe/15183/carrot-patties/
Tescos Real Food – https://realfood.tesco.com/recipes/cumin-and-fennel-hasselback-carrots.html
Sunset – https://www.sunset.com/food-wine/kitchen-assistant/carrot-recipes
Whole books have been written on the subject of meals made with carrots. there are hundreds of compilation blog posts with 30-40+ carrots recipes in them and a Google search produced 75.4 MILLION different posts and recipes. I think it is safe to say carrots are rather versatile and the options for meals and side dishes completely endless.
As someone who eats a predominately plant based wholefoods diet, I love how I can make 7 different meals in as many days and nothing be the same except the carrot itself. For someone like my partner they make a great side dish in so many ways with the occasion surprise veggie dish as well.
The great thing about carrot dishes is that for the most part they are freezable therefore making meal prep and batch cooking a doddle making life simpler and easier for you and causes less waste for you also. For the most part if you are meal prepping for the freezer you want to only blanch the carrots and not ever fully cook them.
Do remember though that carrots have a tendancy to oxidise slightly if NOT peeled. Grated carrot is absolutely notorious for this so peeling you carrots is absolutely the best way to go about things if you are freezing them. Peels of course can be kept to go in stocks or soups so there is no need for waste.
10. CARROT CHIPS

She’s Naturally Sweet – https://www.shesnaturallysweet.com/carrot-crisps/
Carrot Crisps or Chips are one of my favourite snack foods. They keep for a good couple of weeks in an airtight container if cooked to fully crispy like a potato chip and make a great alternative to bought potato chips from the store.
What I really love is the simplicity of making them. Sometimes I make use of my peels this way as well just if the left over carrots are a bit more important for meals than my need for something yummy to snack on while watching a movie.
They can be baked, fried or done in the air fryer. As long as you cook them to golden and crispy they are happily stored in an airtight container for a good couple of weeks as long as you have strained any oil off well. If not and a bit softer, probably a better idea to keep them in the fridge or cook them for a bit longer. It’s entirely up to you.
In the end whatever way you choose to go to make your carrots go that little further and for longer please do all the research first. Ask questions and plan ahead. Do small batches when you try new things and enjoy the process. This is not about creating more stress it’s about taking some of that off you.
As always here is the video to go with this blog
