
Here in the UK national supermarkets have been dropping prices on what they consider to be Christmas or Easter veg. Things like Potatoes, Carrots, Fresh Beans, Shallots, Broccoli, Parsnips, Swede (also known as Rutabaga), White Cabbage, Brown Onions, Curly Kale, Red Cabbage, Savoy Cabbage. Obviously each store has a choice of around 5 of these and some included fresh herbs. It did mean that many who may not have been able to afford a good meal, now stood a chance. It also meant that many of us purchased a couple of extra packs for preserving for later in the year. Some took that to a whole new level that was absolutely not ok but thats not what we are here to discuss. What we are discussing today is how I preserved the beans and why I had to do it so fast.

We left our purchasing of the veg until the Friday before Easter. We made sure to only purchase 5 packs from each store so not to take too many and leave a store without for others who were only being paid that day or only had the chance to go either that day or Saturday. We did our rounds, came home, decanted everything into totes and collapsed in a heap. Sunday morning I woke up to find that some of our veg was already rotting so for the first part of Easter Sunday I spent a few hours in from of movies prepping veg for preservation so as they would not go off before we could do the rest of the work the next day.

This included the beans. Both sorts, the Runner Beans and the French Green Beans. It was honestly heart breaking to see but I got to work. I was aware Tanny prefers the French Style Beans and that I basically had the Runner Beans to do what I liked and although I sliced some for freezing I also made sure to ferment some with the Broccoli stalks I had also had to prepare for preserving due to it starting to go yellow.

FREEZING GREEN BEANS
Freezing green beans is a really simple process. I know many may feel it’s alot of work and some may say I add an unnecessary step but I believe the step I add saves time and product later on down the track.
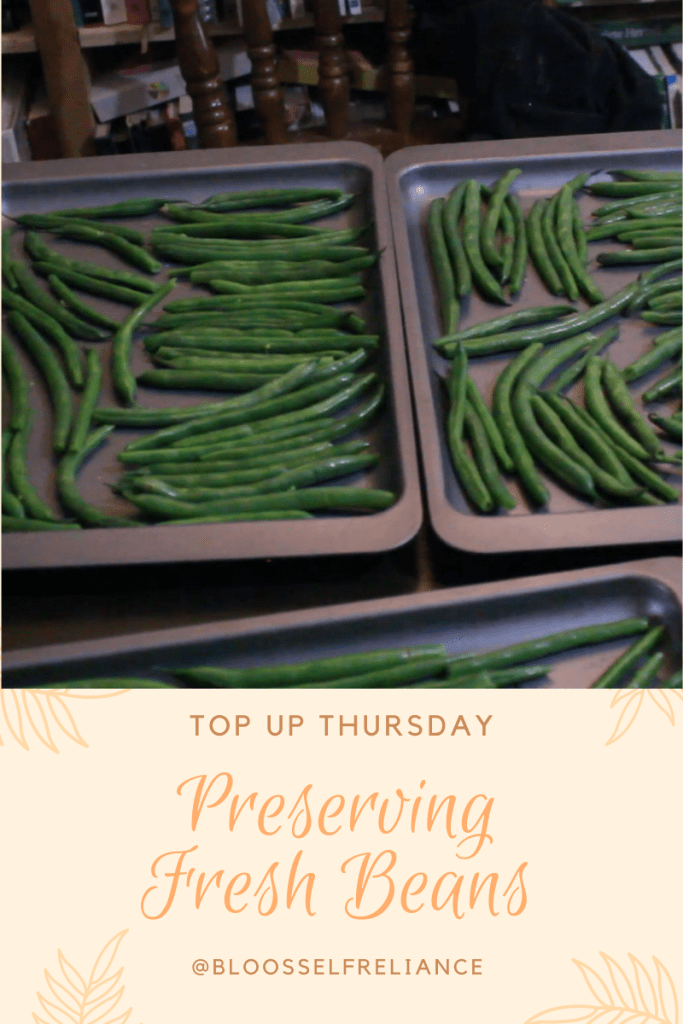
My first step always is to prep the beans. Depending on the type of beans this will depend on how much work I do.
For French Beans (the ones seen above) the round shaped ones that look like a long green cigarette, I will generally just do what is known commonly as “top and tail”. This process is basically taking off the top 1/4 inch / 1/2 cm from either end of the bean. That is literally all there is to it.
For Runner Beans (which are the long flat beans) I will absolutely top and tail and then in general I will either. Cut into 2 inch/ 4cm pieces on the diagonal (just because I like to be fancy, it really doesn’t matter so much) or I will run the beans through a bean slicer and have long thin strands. I haven’t done that for a good long while though. I may have to give it a go next time.
Once the beans are prepped I will blanch the beans for 1 minute absolutely no more in hot/ boiling water.
Blanching means to drop whatever it is you are wanting to blanch in hot/boiling water for 1 minute and pull out quickly before it properly cooks. Some vegetables may take a little longer but you can always tell when it’s ready by the colour. Blanching brings out the fullness of the colour of what you are doing so green beans are brighter green, carrots are brighter orange etc.
The next step is to get all the beans out and into ice cold water. If you do not have ice then use cold running water. or change the cold water out as it gets warm until it no longer gets warm. This shocks the beans into stopping the cooking process.
Once the shocking is complete, place the beans in a colander over a bowl to drain as much of the excess water off as possible. If you are pressed for time you can pour them out onto a very clean cloth and pat them dry. I personally prefer to have a brew while I wait for them to drip.
Once dry I lay out my beans in a single layer (or as single layer as I can get) on baking trays. This is the step many think is pointless but I have found it to be absolutely the best thing I ever did. Placing your veg or fruit or whatever you are freezing like this means that when they are bagged up, you can pull out only what you need without having to bash the bag, or take too much or even cook all of it when you don’t want to. Using this step I only ever have to take out from the bag what I want to use in that moment. So once your beans are all out in the single layer you can pop them in the freezer over night or for up to 24 hours to be sure.
Once your beans are frozen simply label a freezer bag and pack your frozen veg away. Make sure to close the bag or container properly and then place back in the freezer for when you want them.
It’s honestly that simple. Now I know people will think that’s a phaff but it really isn’t and the whole process for us took around 1 1/2 hours over 3 days as you will see (or have seen) in the video.
————————————————————————
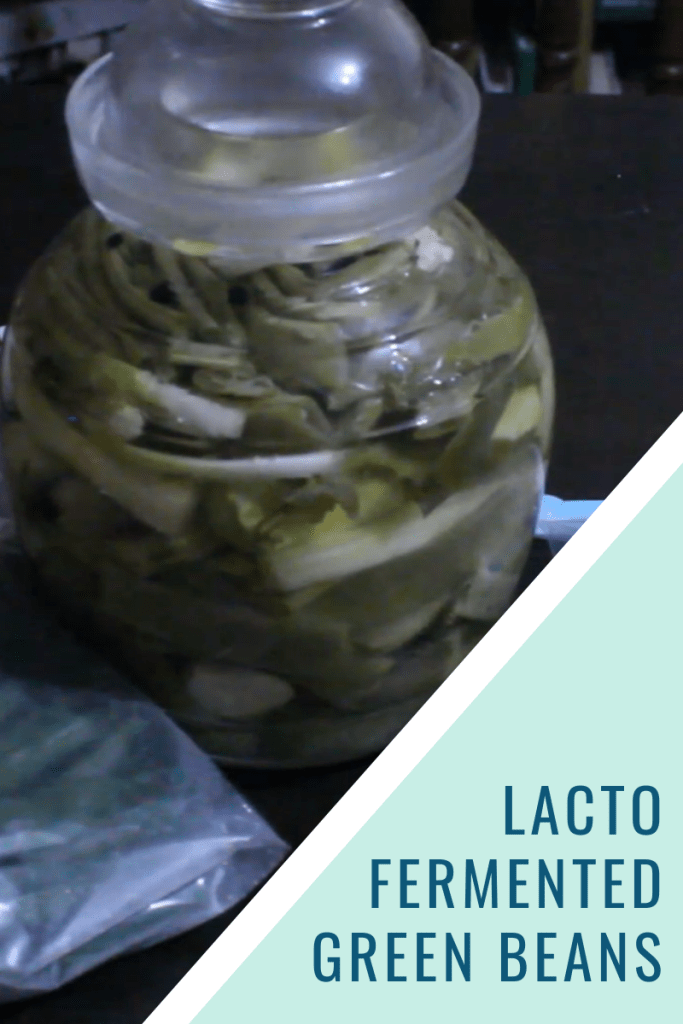
Fermentation
This absolutely was my next step and I decided to use some of the runner beans along with some of my broccoli stalks and some spring onions to make a beautiful, fresh, lacto fermented pickle to go with other dishes or just to snack on.
INGREDIENTS
3 Good Handfuls of Fresh Green Beans ( I used runner beans)
3 Stalks of Broccoli, cut in sticks
2 Bunches of Spring Onions
2 Tablespoons Fennel Seeds
1 Lemon, rinds cut in strips
6 Garlic Cloves
2 Tablespoons Sea Salt
Water to cover
METHOD
Pour in 1 Litre of your water to your fermentation pot and add Salt. Mix well and make sure salt is dissolved before moving on.
Place a good handful of the broccoli stalks on the base of the pickle pot.
Grab some of the spring onions and layer those on top of the broccoli.
Add in half your garlic, a couple of good strips of lemon rind and half your fennel seeds.
Then add your beans in in a good thick layer.
Repeat the process until your pickle pot is filled.
Fill with water over the top of the veg.
You can if you wish add a couple of black peppercorns, just for a little bit of something at the end not many though.
Seal the pot. I prefer to use a moat of vinegar to prevent mold growth and it also slows down evaporation from the moat itself.
These will be ready in the next 4-5 days and will keep as long as you keep the moat in the pickle jar topped up and the jar sealed.
—————————————————————————
So there you go guys my little mini guide to freezing and fermenting green beans when you have a glut or can find them on the cheap.
Please do remember when offers are on don’t take all of them. Other people need to eat as well.
